
Ankle Projections
Patient Preparation
- Explain the procedure to the patient.
- Remove footwear, socks, and any metallic objects near the ankle.
- Ensure patient comfort and immobilization to prevent movement.
- Apply lead shielding as appropriate.
BASIC PROJECTIONS
1. Anteroposterior (AP) Projection — Ankle
Positioning:
- Patient supine or seated with affected leg extended.
- Dorsiflex the foot so that the plantar surface is perpendicular to the image receptor (IR).
- Ensure the ankle joint is not rotated.
Central Ray (CR):
- Perpendicular to the IR.
- Directed midway between the malleoli (at the level of the ankle joint).
Collimation:
- Include distal tibia and fibula, talus, and proximal portion of the metatarsals.
Evaluation Criteria:
- Normal overlapping of tibiofibular articulation except for the distal tibiofibular joint.
- Medial and superior aspects of the talar dome clearly visualized.
- No rotation of the leg.
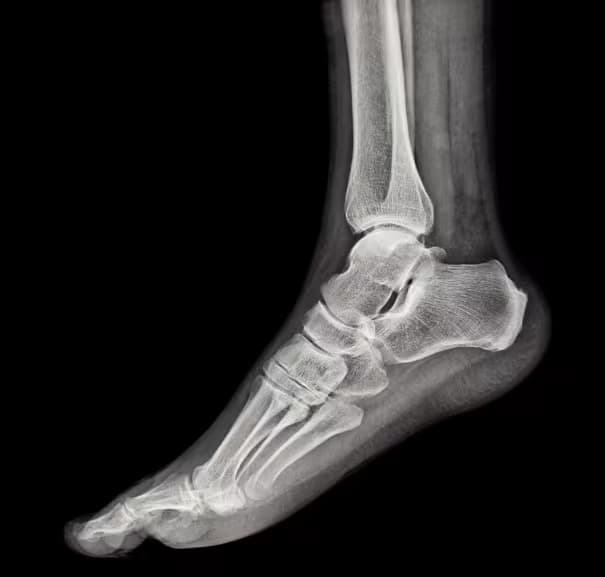
2. Lateral Projection (Mediolateral) — Ankle
Positioning:
- Patient lies on affected side.
- Foot dorsiflexed so plantar surface is at right angle (90°) to the leg.
- Center ankle joint to the IR.
- Ensure fibula is over posterior half of tibia.
Central Ray (CR):
- Perpendicular to the IR.
- Directed to the medial malleolus.
Collimation:
- Include distal tibia and fibula, talus, calcaneus, and base of fifth metatarsal.
Evaluation Criteria:
- Distal tibia and fibula superimposed.
- Talar domes superimposed.
- Open tibiotalar joint space.
OTHER PROJECTIONS
3. AP Mortise Projection — Ankle
Positioning:
- Patient supine or seated.
- Leg extended and foot dorsiflexed.
- Internally rotate entire leg 15–20° until the intermalleolar line is parallel to the IR.
Central Ray (CR):
- Perpendicular to the IR.
- Directed midway between the malleoli.
Collimation:
- Include distal tibia and fibula, talus, and proximal metatarsals.
Evaluation Criteria:
- Open mortise joint space (tibiotalar joint).
- No overlap of anterior tubercle of tibia and fibula.
- Talus centered in mortise.
4. AP Oblique Projection — Ankle (Medial Rotation)
Positioning:
- Patient supine or seated.
- Dorsiflex foot.
- Rotate leg medially 45°.
Central Ray (CR):
- Perpendicular to IR.
- Directed midway between malleoli.
Collimation:
- Include distal tibia/fibula, talus, and tarsal region.
Evaluation Criteria:
- Distal tibiofibular joint open.
- Distal tibia and fibula in profile.
- No overlap of talus and lateral malleolus.
5. AP Stress Projection — Ankle (Inversion and Eversion)
Positioning:
- Patient supine or seated with affected leg extended.
- Dorsiflex foot to right angle.
- Physician or technologist applies inversion and eversion stress while maintaining ankle position.
Central Ray (CR):
- Perpendicular to IR.
- Directed midway between the malleoli.
Collimation:
- Include entire ankle joint and distal tibia/fibula.
Evaluation Criteria:
- Demonstrates integrity of ankle ligaments.
- Comparison of joint space widening on stress views.
- Useful for detecting ligamentous injuries or instability.
Image Evaluation Checklist
- Proper exposure and contrast for both soft tissue and bony detail.
- Entire ankle joint visualized.
- No motion or rotation (except where required).
- Anatomical markers correctly placed.
Common Pathologies Demonstrated
- Fractures of malleoli, distal tibia, or fibula.
- Joint dislocation or subluxation.
- Ligamentous injury (stress views).
- Arthritis and degenerative joint changes.
- Osteochondral lesions of the talus.